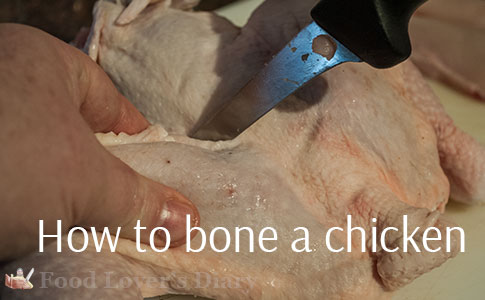
Boning a Chicken - a step by step guide
By: The Food LoverChicken is a popular food in our household, but I rather like to stick to free range, both for ethical and taste reasons. But free range chicken is more expensive than other chicken, there is no doubt about that. However, a medium sized Free Range chicken, properly boned, will give nearly the same amount of meat as a packet of 4 intensively farmed chicken breasts, and it is actually only a pound or so more in price. And you get the succulent red meat as well.
Whichever chicken you use, this is how to bone it. To be honest, once you get up to speed it takes only about 10 minutes and you get a better product. I hope I have made this step by step guide simple enough.
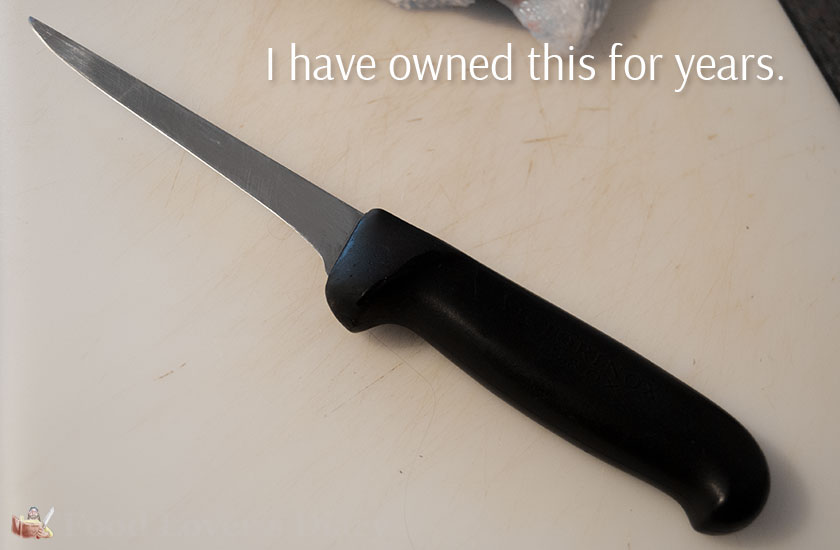
Before you do anything else, it is really important to get yourself a good knife. Trying to do this with a carving knife, or large chef knife is impossible. You want a very sharp boning knife that can handle anything. Stay away from expensive makes; for this sort of job, you can't do better than the Vetrinox butcher's boning knife. They cost about fifteen pounds and will last you for years.
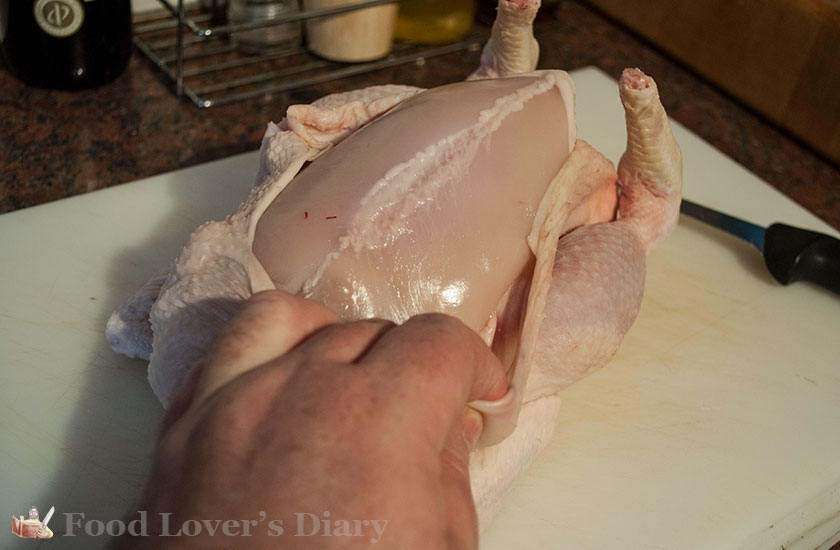
The first step is to pull the skin away from the breast. Don’t try and skin the entire chicken right now, it is much easier to do it as you go. Just grab the skin and give it a strong pull. It should come away easy enough.
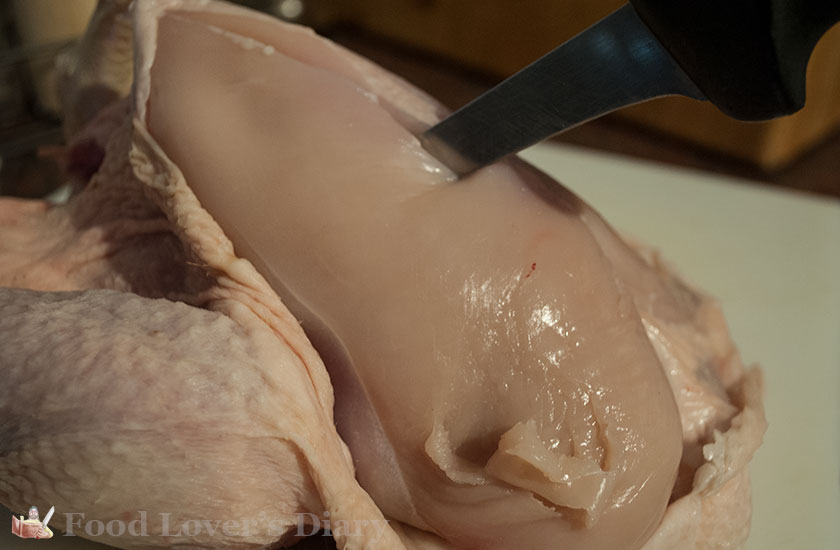
Start by removing the breasts. This is the best place to start as the legs help stabilise the bird as we work on it. Cut in on one side of the breastbone with the point of the knife, and cut down the length of the bird keeping right next to the breastbone.
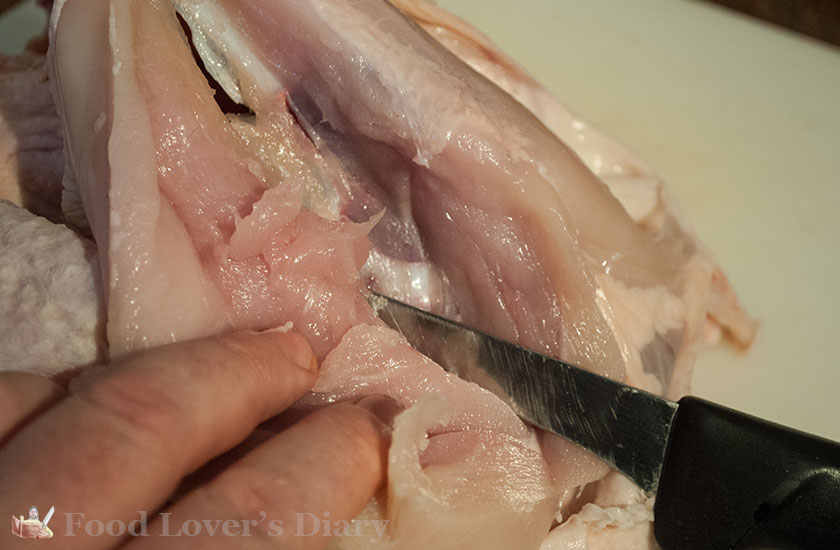
This is a bit like filleting a fish. From about 2 cm down, the ribcage swells out. Carry on cutting slowly, staying as close to the bones as you can. Free the breast meat cleanly while leaving as little as possible behind.

You will need to work around where the wing is attached at the bottom of the breast. This is where that sharp point is very much appreciated – make sure you keep it sharp with the rest of the knife. Repeat the procedure with the other breast.
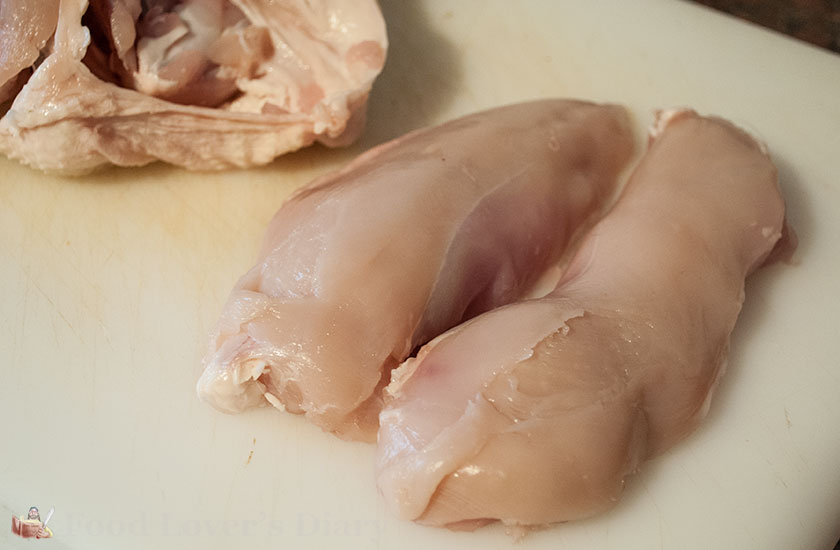
You should now have two breasts all clean and ready. If you wish, this is a good time to just trim off any excess fat there may be still attached. If you have a really high-quality, free range bird, then you may find it has more fat since it has been running free outside.
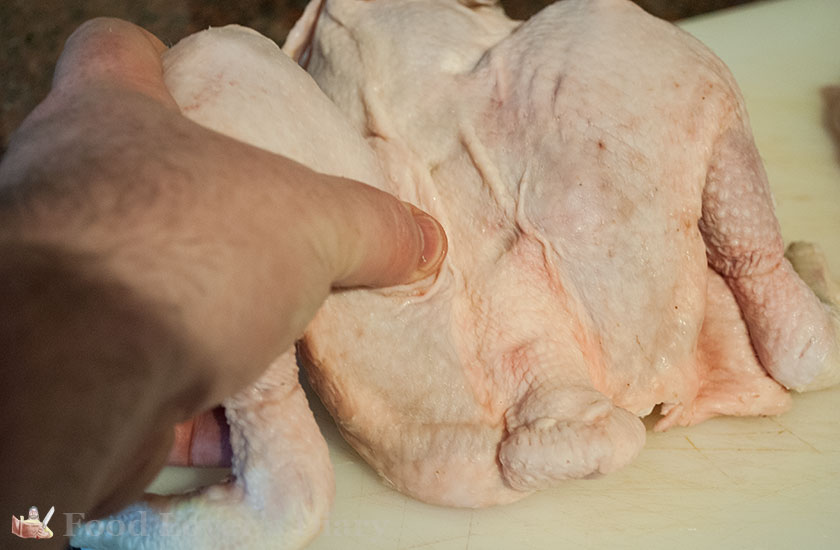
Turn the bird over and grab both legs. Pushing your thumbs into the backbone, pull the legs toward each other until you dislocate them from their sockets. This makes boning the bird a lot easier. Yes, I know I have only one hand in the image – the other is holding the camera!
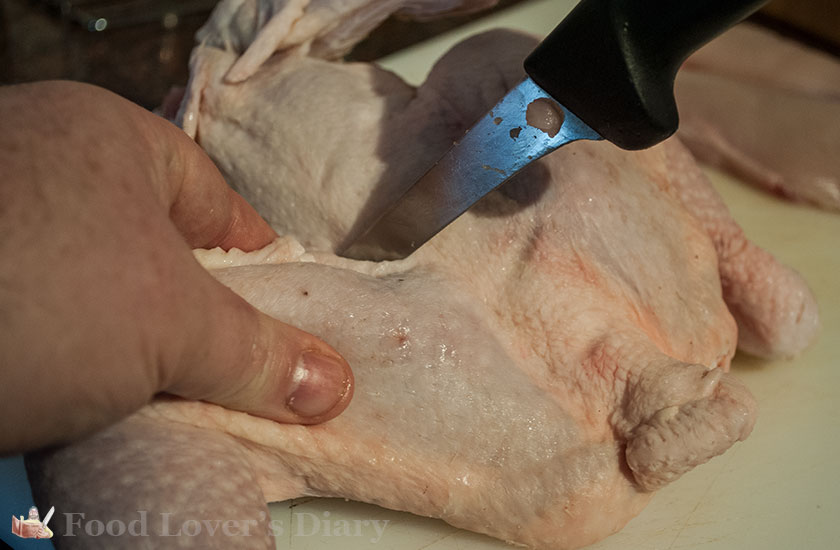
Cut the legs off the bird, following the contours of the bones as closely as possible. You may need to work your way through the join with the knife, despite having dislocated the leg, but just take your time and the leg will come away easily.
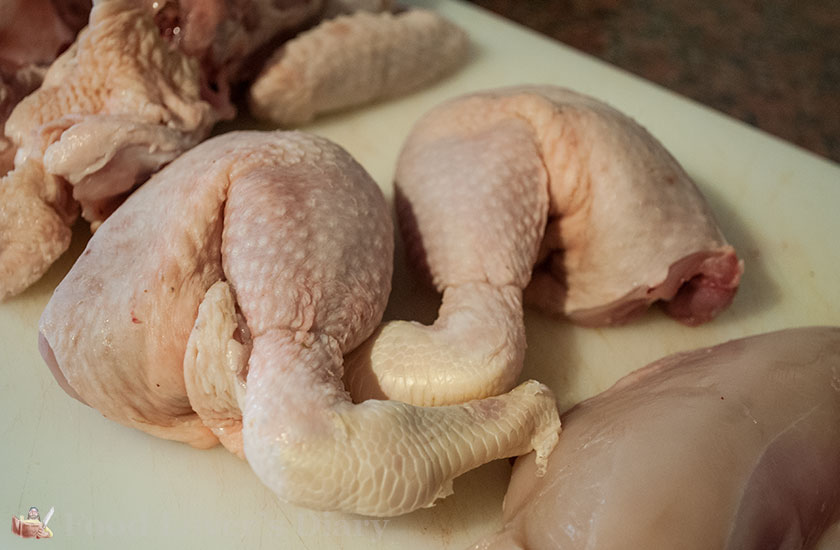
You now have two legs with skin still on. This is the time to pull the skin off. Just grab the loose end and pull it back towards the foot end, turning it inside out as you go. It is a bit like pulling a sock off! You will need to give it a hard tug to get it off the end of the leg. If it is too tough, cut it off.
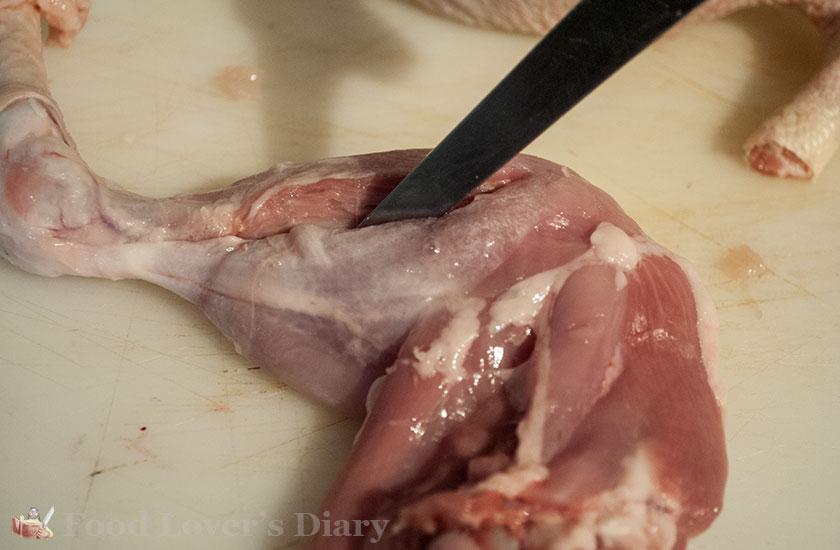
The next bit is the most difficult, especially if you want to keep the leg meat in one piece, for instance for stuffing. Give your knife a quick sharpen, then cut down the length of the bone on one side of the leg only, all the way along the drumstick and then along the thigh. Keep as close to one side of the bone as you can and only go to the depth of the bone, not all the way through the meat.
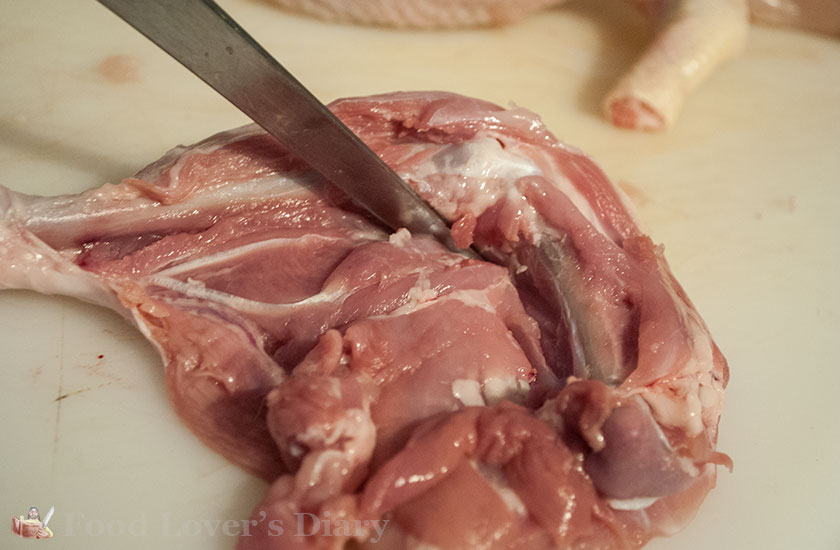
Working you way carefully around the knee joint, you should be able to free the meat away from the bone. Repeat the procedure the other side of the bone to free the meat completely. Then do the other leg. You will certainly appreciate a sharp knife at this point. Just for interest, you should try doing this with a quail!
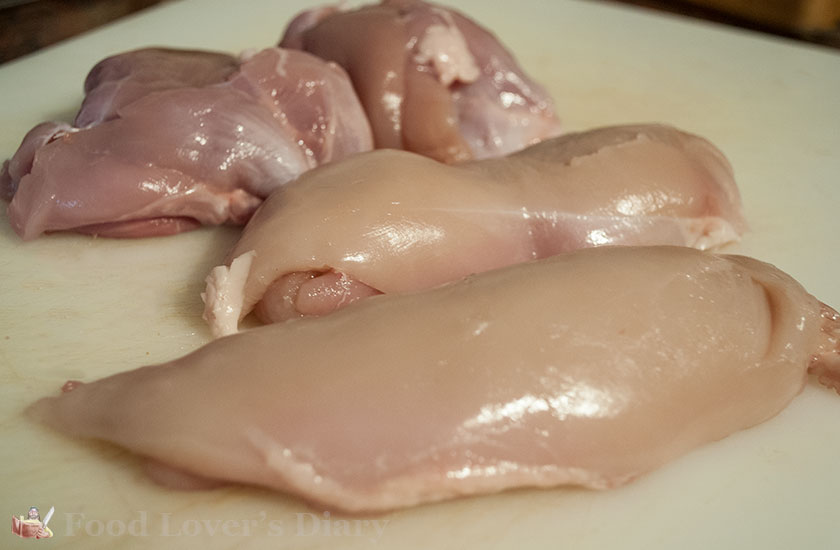
And there you have it – two breasts and two legs worth of meat which will make a fine curry for six people. Depending on what you are doing, you can get a little more meat from around the carcass if you look carefully.
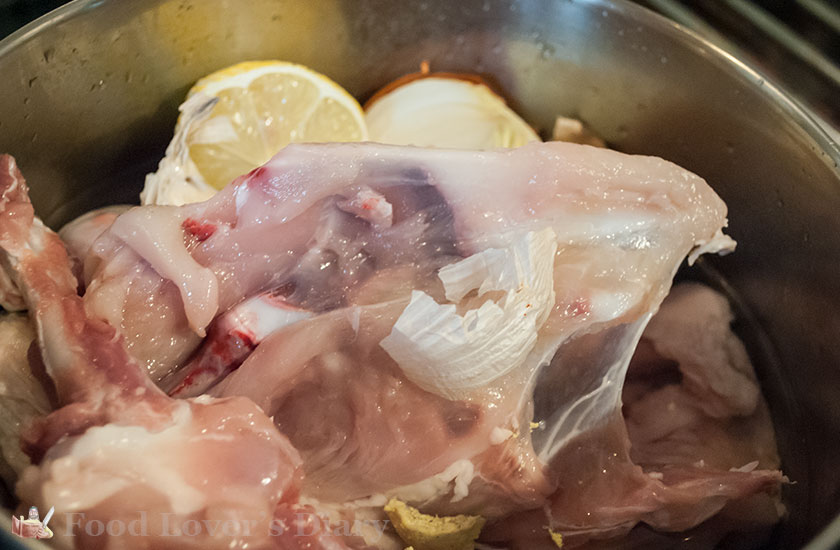
Talking of the carcass, don't waste it. Bung it and the leg bones in a pan with salt, half a lemon, couple of garlic cloves and half an onion and make some nice stock.
And there you go. One de-boned chicken, a nice stock and the feeling of a job well done.
Happy boning, and try not to take your fingers off!
Share


Advertising

A Wonderful Fantasy
Get the wonderful fantasy Dirt


Comments
Please feel free to comment - no anger, no bad vibes, no trashing people. Just sit around, enjoy a flagon of beer and mull over the world. You can login with Disqus, Facebook, Twitter or Google.