
How to Photograph Food
By: The Food LoverTaking photos of your dinner can be rather fun, though at the risk that your food either goes cold or melts, depending on the dish. Working on the website has allowed me the luxury of snapping away, something I should do more, probably.
Taking photos of food is not very difficult, but there are a few tips and tricks that are worth thinking about.
Do you need specialist equipment?
Well, yes and no – mostly no. You do not need lights, extra light meters, reflectors, a crew, or any of the other bits that pros use. But you will need a reasonable camera and probably a tripod of some description.
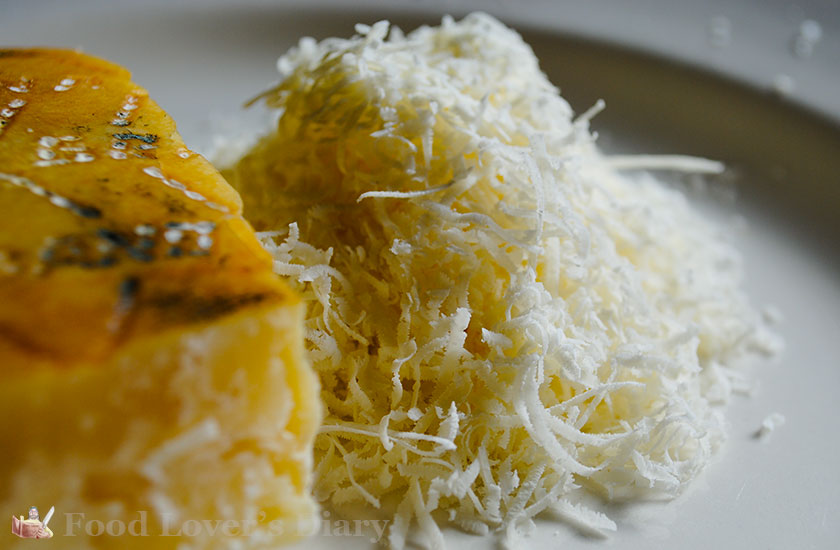
I use a basic DSLR – Nikon D5300 – and I am really pleased with the photos. Having said that, I have also had some success with my phone, though getting really good depth and contrast is hard work and not always successful. The photo at the top of the page is taken with my iPhone 5 (it had to be - my camera is in the bloody picture!), but I did use the Google Nik filters to get the feel I wanted and make it look posher!
Where you are using low light, a tripod is really useful. It saves you using flash and means you don’t get camera shake. Also, if you want to increase the depth of field on Aperture Priority on the camera, then you will end up with a lower shutter speed and risk camera shake. I take a lot of woodland photos. Even in summer is not unusual for me to use 30-second exposure lengths. I do not suggest that in your kitchen while cooking; you might burn your onions.
Lighting
The best light for food is daylight. Take your plate of food outside or set up next to a nice big window and photograph it there. Natural light works really nicely. I have a kitchen counter by a big window and I use that in the morning. In the afternoon, I have to go out the back. Sunlight is a very nice light, and on a bright day gives wonderful shadows. Not so great when it is raining, however.
Light-dark contrasts can really help, so outside you may want to throw a shadow across your plate of food. Just use a couple of sticks or a strip of cardboard pegged to a tripod – in the film world, they were called Charlie Bars if I remember rightly.
If you are inside, grab the brightest light you can find (a reading lamp or something) and shine it directly at the food. I have a cheap (£18) reading lamp with a daylight bulb that gives a reasonable white/blue light that is very useful.
Remember, you can remove the yellow tungsten lighting effect using an image editor, so don’t panic if you do not have daylight bulbs – just turn all the lights on.
If you are going to use flash, save up and buy a Speedlite of some description. Nikon Speedlites are wonderful but really expensive. The Meike MK910 I use is only £70 and is very similar in operation to the Nikon version. I get really good results with it. However, you probably don't want to shine it directly at the food, but use it at an angle. If you can afford two and use one as a remote, you can have even more fun, but the photography will become a lot slower!
Getting your food to pose
Just like taking shots of a model, the subject needs to look good. There is a limit to what you can do to prettify something later, even with the entire Adobe creative suite! The best way is to get everything right at the time.
Turn your plate of food round and round several times till you find the right direction. If you are taking a close-up, not everything will be in focus, so you want to ensure the most important part of the dish takes pride of place.
Once you get the right angle, adjust the food on the plate to make sure you don’t have anything annoying sticking up that is distracting; if you have parsley on the plate, it is probably the leaf you want to see, not the stalk, so move it. Make sure the plate is clean around the food and choose a plate that allows the food to stand out. A heavy pattern on the plate may well be distracting. My rule is plain food on interesting plates, decorative dishes on plain plates.
If your food is not sitting on a plate, you may want to have some fun with textured surfaces. I bought a sheet of Stainless Steel online a few years ago which has given me lots of fun. But things like tea towels, bits of cloth, scraps of wood, table tops – they can all add interest.
Framing
Once the plate looks good, experiment with framing. Having a lovely background is fine, but it is the recipe you are selling here, not your precious pine table! So the eye should be drawn towards the food.
In practice, this means making the image of the food as large as possible in the shot. You may even want to show only part of it. Be careful with things like chilli and bolognese; an eyeful of mince is not the most edifying thing out even if it tastes wonderful and you may want to zoom out a little and show it in context.
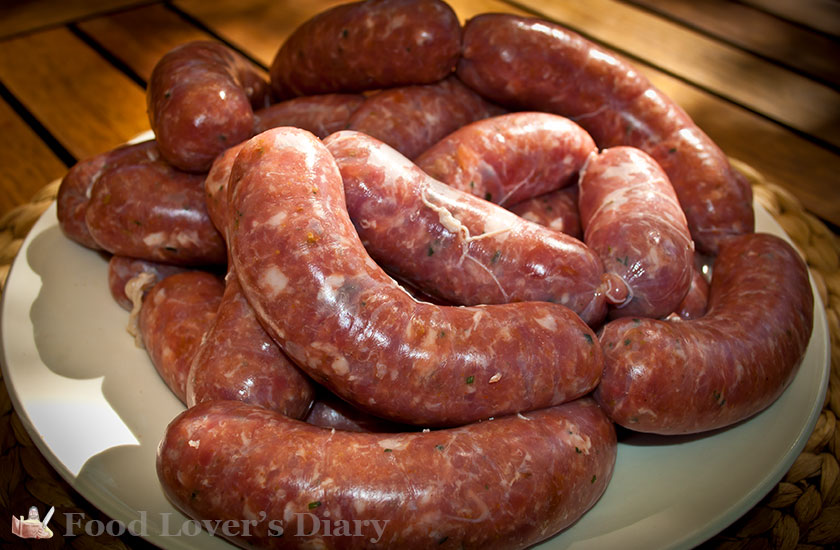
Sausages are so photogenic!
Try and avoid taking a photo from straight above the plate, unless you have some good creative reasons, or are trying to explain something. It can very quickly turn your 2-star Michelin effort into looking like something from your old school canteen. Go for a low angle with a small depth of field – that means that anything in front of or behind the point you have focused on will go out of focus quickly.
Note: on a camera where you can adjust the aperture of the lens (how wide it opens) – making the aperture smaller (increasing the F number) will increase the Depth of field – going the other way, will reduce it, so more of your photo will be out of focus. I tend towards the latter, normally.
Of course the subject matter makes a lot of difference. I am not sure it would have been possible to take a bad photo of these beauties.
Take lots of photos
Trust me, the more you get into this, the fussier you will get so take lots of photos of your dish.
- Play with the focal point.
- change the angle and experiment zooming in and out.
- Play with shadows and contrasts by changing where the light source is and how bright it is.
- Double check your plate is clean - something I forget myself. Gravy is most unreliable.
- Move the plate around and play with anything else that is in the shot.
There is nothing worse than uploading your image to find that it was not quite right. So give yourself lots of choices, then choose the one you like most. Since this is all digital, it costs nothing to take many photos. We were probably fussier and cleverer in the days of film where every photo cost extra.
A quick note on photo quality – ALWAYS set your camera to the highest possible quality. If your camera takes RAW files (Nikon raw files are called NEF) use those. They allow more manipulation later and are better quality.
Things to watch out for
This is the section where I should learn to take my own advice more often as I often get these wrong.
- Avoid shadowing the far side of your dish or having a murky, grubbing background – these are more difficult to sort out later unless you are working with a decent app like Photoshop and will make your shot look amateurish
- Avoid direct flash as it will cause the problem that I just said about murky backgrounds. I tilt my flash up slightly and use the diffuser that comes with it.
- Triple check your plate is clean and there are no distracting blemishes anywhere.
- Make sure your lens is clean and not misted up by the cooking. Having said that, steam from the frying pan can look interesting when using flash.
- If taking a picture of frying, keep a bit of distance and zoom in rather than get grease on your camera.
- Be critical about the amount of light. Darkening a photo in photoshop is fine. Brightening it will increase noise. So go and steal more reading lamps if needed
- Don’t have anything in the background that you have to cut out later. It is quicker to move the filthy dishcloth by hand than have to paint it out.
- Don't ever say “Oh, I will sort it in Photoshop.” Get it right in the camera as you may find it is less sortable than you hoped.
- Check your focus again and again
- Use manual focus if possible, especially on closeups, so that you focus on what YOU want rather than what the camera wants.
- Set the ISO on your camera to something like 100. This may mean that the shutter speed is slower so you need to be on a tripod, but the result will have far less noise.
Processing your photos
You may take such good photos that you don’t want to play with them, but I like to fiddle.
I have Photoshop subscription with Adobe which gives me Lightshop, Photoshop, Adobe Bridge and a ton of plugins, but you don’t need to go that far. If you want to spend money, Photoshop Elements is around £80 I think. Otherwise, The Gimp is a free, very powerful bit of software and there are lots of online systems like Pixlr.
I use the Google Nik plugins for photoshop a lot. They used to cost, but are now free, though no longer developed, I believe. They are still good, though, so go grab them here.
The main adjustment I make later is White Balance – this is changing the tone to compensate for things like tungsten lighting, or going the other way and adding a bit of warmth. However, I do often lift the Blacks slightly and play with Vignettes. Don’t overdo any of these; just light touches will produce better results.
Be careful about reducing noise. This will smooth out the photo and you might lose some definition which you will regret later. If you shot in bright light, you shouldn't have this problem.
Keep the image as clean and clear as possible without fancy effects. You are selling your wonderful recipe, not a clever filter so stay away from making it look like a dodgy watercolour!
When using a vignette to darken the edges, be aware that the overall effect will be to darken the entire image. So you may have to brighten the image, but this may make the central area look over exposed and the make the highlights and whites too bright. Again, light touches.
And Finally
Food photography is a lot of fun and it can give wonderful memories as well as showing off your cooking skills.
It does not need much money, but it does need a little patience. That will pay dividends in making your food all the more attractive for your readers.
Happy snapping!
Share


Advertising


A Wonderful Fantasy
Get the wonderful fantasy Dirt


Comments
Please feel free to comment - no anger, no bad vibes, no trashing people. Just sit around, enjoy a flagon of beer and mull over the world. You can login with Disqus, Facebook, Twitter or Google.